
Static Site Generator
Posting Date: 2022-07-29
https://github.com/zachlankton/zwc-website
Intro
This project is a static site builder that I created to generate this portfolio site you are reading right now! Why in the Sam Hill would someone do such a thing?! For fun and learning, of course! I know that I could have easily used one of the many choices out there for generating static sites, but I had this idea that I wanted to try out, and this is the result.
I have used handlebars quite a bit for templating in the past, and I wanted a site generator built primarily from handlebars with content written in markdown files. Many static site generators follow similar templating patterns, with some even using handlebars! As of this writing, 33 out of 335 site generators on Jamstack.org list handlebars as one of the available templating engines. It looks like I’m not alone in the world of thinking that I have an excellent idea for a better static site generator!
Quick Start
Only tested in Linux! Specifically Ubuntu.
Windows is not supported at this time.
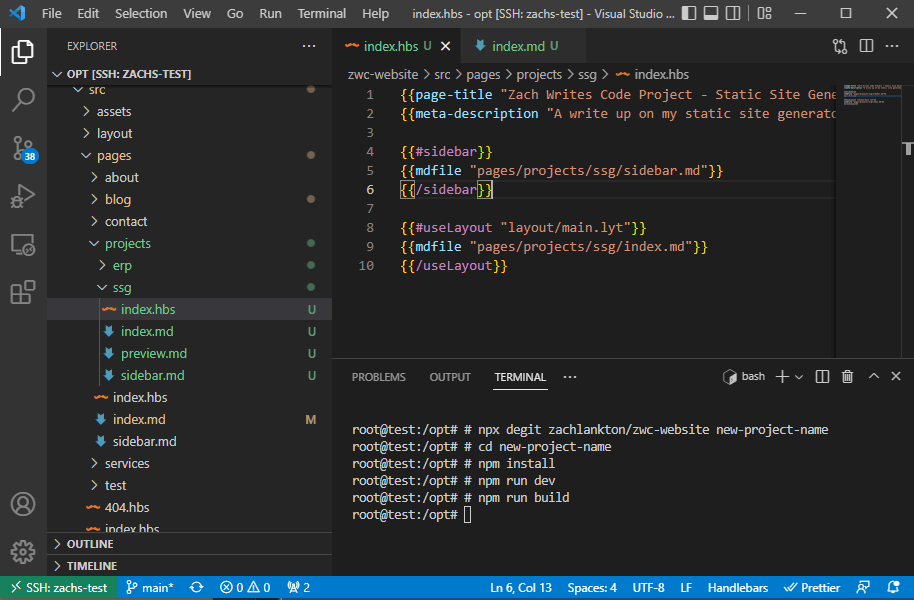
The best way to try out my site generator is to degit my website repo. This repo contains both the source code that generates the site and the source code for this site itself. This is intentional as I wanted the ability to make changes on the fly to the generator if I needed to. The generator code is relatively small and pretty easy to grok.
Run the following commands to get up and running quickly.
npx degit zachlankton/zwc-website new-project-name
cd new-project-name
npm install
npm run dev
Project Structure
Directories:

|-- bin             # Primarily files for the development server

|-- config          # Config files for customizing the build

|-- functions       # This folder is for Cloudflare Pages Functions

|-- lib             # The library code for generating the site

`-- src             # The source for the actual site itself.
Site Structure
./src

|-- assets
|   |-- imgs
|   |-- scripts
|   `-- styles

|-- dev-server.js

|-- layout
|   |-- main-sidebar.md
|   `-- main.lyt

`-- pages
    |-- about       <---, Sub Folders
    |-- blog            |
    |-- contact         |
    |-- projects        |
    |-- services    <---'

    |-- 404.hbs
    |-- static.html
    |-- index.hbs
    |-- helpers.mjs
    |-- index.md
    `-- sidebar.md
Build
A static build can be generated by running:
npm run build
This will, by default, create a dist folder in the root of the project and output all build files into it.
This SSG is a Multi-Page Site Generator. The output is based on the files in the src/pages folder. If you are familiar with file-based routing used in frameworks like next.js you will be at home.
In a nutshell, everything you create under the pages folder is replicated practically identically in the output folder. There are a few exceptions to this rule:
*.hbs(handlebars) files are templates that are rendered by the builder, not copiedhelpers.mjsfiles are imported before rendering any files in that directory, not copied*.md(markdown) files are ignored by the builder completely
Files that end in *.hbs will not be included directly in the output.
*.hbs files are handlebars templates that will be rendered during build time.
The resulting output will be an *.html file.
Examples:
  ./src/pages/helpers.mjs     will be IMPORTED BEFORE RENDERING     (NO OUPUT)
  ./src/pages/index.md        will be IGNORED / SKIPPED             (NO OUPUT)
  ./src/pages/sidebar.md      will be IGNORED / SKIPPED             (NO OUPUT)
  ./src/pages/index.hbs       will be RENDERED into   ./dist/index.html
  ./src/pages/404.hbs         will be RENDERED into   ./dist/404.html
  ./src/pages/blog/index.hbs  will be RENDERED into   ./dist/blog/index.html
  ./src/pages/blog/post.hbs   will be RENDERED into   ./dist/blog/post.html

More Examples (COPIED):
  ./src/pages/static.html      will be COPIED into     ./dist/static.html
  ./src/pages/main.js          will be COPIED into     ./dist/main.js
  ./src/pages/blog/blog.js     will be COPIED into     ./dist/blog/blog.js
  ./src/pages/blog/blog.css    will be COPIED into     ./dist/blog/blog.css
Markdown
Markdown (files that end in *.md) are ignored by the builder and not copied to the output. They lie dormant until a handlebars helper mdfile is called inside a handlebars template. This will be explained in more detail below.
This project depends on the Markdown-it library to render markdown files, which uses the Commonmark Spec. Highlight.js has been integrated to include pre-rendered static code highlighting. The only thing that needs to be shipped to the browser is the CSS style of your choice. assets/styles/a11y-dark.css is included by default. Additional styles can be found at https://github.com/highlightjs/highlight.js/tree/main/src/styles
Generating highlighted markdown
The builder will automatically pre-render markdown fenced code blocks that include a code label with the correct highlighting structure. No client javascript is needed.
```javascript
function hello() {
  console.log("Whattup!");
}
```
will render as:
function hello() {
  console.log("Whattup!");
}
Built-in Helpers
useLayout           - used to include content in a layout
sidebar             - used to include content in a sidebar
page-title          - used to set the page title
meta-description    - used to set the meta description
mdfile              - used to import a markdown file
convertMD           - used to convert markdown text
include             - used to include another handlebars template
anchor              - used to create an HTML anchor element
dev-server          - used to include the dev script on a page (if in DEV mode)
These are handlebars helpers that are registered before building any templates. If you are unfamiliar with handlebars helpers, you can find more information here: https://handlebarsjs.com/guide/#custom-helpers
The code for these built-in helpers is found in
and is very hackable. It is encouraged to look at this source code to see how these are made to get inspiration on building your own custom helpers.
Layouts
These helpers are mainly self-explanatory and are better explained by example. Let’s start with a simple Layout, which shows examples of the following placeholders:
{{PAGE_TITLE}}- gets set bypage-titlehelper{{META_DESCRIPTION}}- gets set bymeta-descriptionhelper{{CONTENT}}- gets set byuseLayouthelper{{SIDEBAR}}- gets set bysidebarhelper
and the following helpers:
mdfile- used to include themain-sidebar.mdin the layout belowdev-server- used only during development, does not run for production
src/pages/layout/main.lyt

<html lang="en">
  <head>
    <title>{{PAGE_TITLE}}</title>
    <meta name="description" content="{{META_DESCRIPTION}}" />

    <meta name="viewport" content="width=device-width, initial-scale=1.0" />
    <link rel="stylesheet" href="/styles/default.css" />
  </head>

  <body>
    <header>
      <p>Zach Writes Code</p>
    </header>

    <main>{{CONTENT}}</main>

    <section id="sidebar">
      {{mdfile "layout/main-sidebar.md"}} {{SIDEBAR}}
    </section>

    {{dev-server}}
  </body>
</html>
Note: the *.lyt extension is used as a personal preference but could be anything. Because this file does not exist inside the pages folder but inside the layout folder, it is ignored until the useLayout helper references it. This is important because if a file named main.lyt were inside the pages folder, it would be copied directly to the output. Not a deal breaker, just probably not desired.
Templates
Now let’s take a look at index.hbs to see how to use the following helpers:
page-title- used to set the PAGE_TITLE placeholder in the layoutmeta-description- used to set the META_DESCRIPTION placeholder in the layoutsidebar- [Block Helper] used to set the SIDEBAR placeholder in the layoutmdfile- used to include a markdown fileuseLayout- [Block Helper] used to set the CONTENT placeholder in the layout
src/pages/index.hbs

{{page-title "Zach Writes Code Projects"}}
{{meta-description "This is the home page for Zach Writes Code"}}

{{#sidebar}}
{{mdfile "pages/sidebar.md"}}
{{/sidebar}}

{{#useLayout "layout/main.lyt"}}
{{mdfile "pages/index.md"}}
{{/useLayout}}
The example above shows that the first couple of lines set the page title and meta description. That is followed by a sidebar block helper with a nested mdfile helper.
The mdfile helper will render a markdown file at the path specified.
Note: paths used in
mdfileandincludeare absolute paths relative to the src folder. This holds true for all files and folders, no matter how deeply nested.Example paths used in pages/index.hbs: layout/main.lyt pages/sidebar.md Example paths used in pages/blog/index.hbs layout/main.lyt pages/blog/sidebar.md
Finally, we see the useLayout block helper with a nested markdown file.
It is crucial that the useLayout helper be the last block in the template as it depends on the data that gets set by
page-title,meta-description, andsidebarhelpers
Sidebars
If you refer back to the layout example, you will see the sidebar section like this:
<section id="sidebar">
  {{mdfile "layout/main-sidebar.md"}} {{SIDEBAR}}
</section>
and in the template, you see this:
{{#sidebar}}
{{mdfile "pages/sidebar.md"}}
{{/sidebar}}
What’s happening is the layout file includes the layout/main-sidebar.md, which will be included on every single page that uses this layout. Then we see the {{SIDEBAR}} placeholder, which gets set in the template itself. This allows you to have “per page sidebar items” using the sidebar block helper as shown above.
Suppose we have the following sidebar markdown files:
layout/main-sidebar.md

- [Home](/)
- [Blog](/blog)
- [About](/about)

---
pages/sidebar.md

- [Top](#top)
- [Section 1](#section1)
- [Section 2](#section2)
When the builder runs, the final output will be:
<section id="sidebar">

- [Home](/)
- [Blog](/blog)
- [About](/about)

---

- [Top](#top)
- [Section 1](#section1)
- [Section 2](#section2)

</section>
Note: Technically, the output will be all HTML, but it’s easier to illustrate with markdown, as shown above.
Assets
The src/assets/ folder is unnecessary as any static assets you have in your src/pages/ will be copied into the output folder. However, sometimes it is nice to keep your fixed assets separate from your pages and templates. This allows you to do that.
Any folder structure/files in the assets directory will be copied/mirrored into the output folder (dist by default)
The assets folder included in this project has the following structure and is self-explanatory:
src/assets/
|-- [imgs]
|-- [scripts]
|-- [styles]
|-- _headers
|-- favicon.ico
|-- robots.txt
`-- site.webmanifest
Custom Helpers
Custom Helpers can be defined in 1 of 2 places. Either in the config/custom.helpers.mjs which will be run before any rendering takes place. Or each folder in the pages directory can have One helpers.mjs file.
Examples:

pages/helpers.mjs
pages/blog/helpers.mjs
pages/blog/blogOne/helpers.mjs
pages/projects/helpers.mjs
pages/projects/projectOne/helpers.mjs
The helpers registered in the config/custom.helpers.mjs can be considered global helpers accessible to all the templates.
The helpers.mjs file in a folder can only be considered a local helper for templates in that directory.
Note: Handlebars helpers only have one scope: global. It is possible to overwrite the global built-in helpers. So don’t create helpers named things like
mdfile,sidebar, etc., unless you know what you are doing.
Another Note: the “local” helper is a leaky abstraction. The helpers registered in one directory do not get unregistered before moving to a new directory. This implies that these helpers might be available in subfolders or even parent folders that get rendered after those helpers are registered. But the only guarantee that gets made for sure is that the templates in the same folder as the “local helper” will have access to those helpers. In other words, do not rely on helpers being available outside their local folder, even though they might be.
How to create custom helpers.
All helper files need to export a loadCustomHelpers function that accepts one argument named regHelper.
function loadCustomHelpers(regHelper) {}

export default loadCustomHelpers;
Inside the loadCustomHelpers function, you can register your custom helpers. The regHelper function is the same as Handlebars.registerHelper function. Here are some examples using our built-in helpers!
import { convertMD, convertMDFile } from "./convertmd.lib.mjs";
import { compileHBFile } from "./compilehbs.lib.mjs";
import { ROOTDIR, SRCDIR, OUTDIR } from "../config/paths.mjs";

function loadCustomHelpers(regHelper) {
  regHelper("mdfile", async (path) => {
    const results = await convertMDFile(`${SRCDIR}/${path}`);
    return new Handlebars.SafeString(results);
  });

  regHelper("convertMD", async (txt) => {
    const results = await convertMD(txt);
    return new Handlebars.SafeString(results);
  });

  regHelper("include", async (path, data) => {
    const results = await compileHBFile(`${SRCDIR}/${path}`, data);
    return new Handlebars.SafeString(results);
  });

  regHelper("useLayout", async function (layout, options) {
    options.data.root.CONTENT = options.fn(this);
    const results = await compileHBFile(
      `${SRCDIR}/${layout}`,
      options.data.root
    );
    return new Handlebars.SafeString(results).toString();
  });

  regHelper("sidebar", async function (options) {
    options.data.root.SIDEBAR = options.fn(this);
    return "";
  });

  regHelper("meta-description", function (desc) {
    this.META_DESCRIPTION = desc;
    return "";
  });

  regHelper("page-title", function (title) {
    this.PAGE_TITLE = title;
    return "";
  });

  regHelper("anchor", function (id) {
    return new Handlebars.SafeString(`<div class="anchor" id="${id}"></div>`);
  });

  regHelper("dev-server", async function () {
    if (this.DEV) {
      const results = await compileHBFile(`${SRCDIR}/dev-server.js`);
      return new Handlebars.SafeString(`<script> \n ${results} \n </script>`);
    }
    return "";
  });
}

export default loadCustomHelpers;
Custom Build
You can customize the build process by making changes to the config/build.config.mjs file. Here the sky is the limit; you can do anything you can imagine. Here is the default config in the project:
#!/usr/bin/env node

import build, { buildPages, includeAssets } from "../lib/build.lib.mjs";

// You can manually build files with custom in and out (w/ optional data) if you need more control
// await build("pages/index.hbs", "index.html", { hello: "Hello World from Data" });
// await build("test1/test2/test3.hbs", "test1/test2/test3.html");

await buildPages();

includeAssets();
The build function takes three arguments:
await build(src, dest, data);
srcis an absolute path relative to thesrcdirectory.
destis an absolute path relative to the output directory, which isdistby default.
datais any javascript object. This data will be passed into your template for you to use however you would like.
This is where you could perform things like fetching data from a CMS or API and then include that data in a manually built template as explained in the comments of the config/build.config.mjs file.
This, combined with custom helpers, would allow you to do creative things like generating many pages from a single template with different data! For example:
#!/usr/bin/env node

import build, { buildPages, includeAssets } from "../lib/build.lib.mjs";

const resp = await fetch("/some/api/that/returns/an/array/of/objects");
const data = await resp.json();

for (let i = 0; i < data.length; i++) {
  const item = data[i];
  await build("templates/list_template.hbs", `items/item-${i}.html`, item);
}

await buildPages();

includeAssets();
Notice we are storing the list_template.hbs in a different folder than pages… this is because the buildPages() function will build anything inside the src/pages folder. But we can make any folder structure we desire inside the src folder. In this case, we make a folder called templates for storing templates for use in our custom builds like this one!

If you enjoy this content, consider buying me a coffee to keep me fueled to make more!